Customer Problem
The problem the customer encountered is that the printer prints blank sheets from the pc and via scan copy. Also an error of #U2-1112 Turn off then on.
Diagnosis
After trying the printer and getting the error myself I thought it could be either the Laser Unit or the toner cartridge. I search for the Service Manual and found the error which expanded on it specifically being either the Laser Unit, the cable connected between the LSU and Mainboard or the MainBoard it self.

As you can see from above the four things to check are the ribbon cable going to the main board, the ribbon cables connecting to the LSU, the LSU and finally the main board. In this blog post I will show directions to reach each one of these areas.
Work Done
So now that I know where to check, I have to begin with taking off the right cover.


After removing the cover the first attempt at resolving the issue is by reseating the following cable shown circled below.

Next you need to remove the Scanner Unit.


Now to remove the Front Cover.


Middle Cover Removal.


Next is getting to the Laser Scanner Unit.


At this point you will attempt to reseat the LSU harness ribbon cable and put it back up the printer partially and see if the problem persists. But in my case I had a similar printer to this and I actually swapped the LSU it self and got the same problem. So I had to do the most difficult solution out of them all which is removing the LSU harness ribbon cable and replacing it with the one from the other printer.
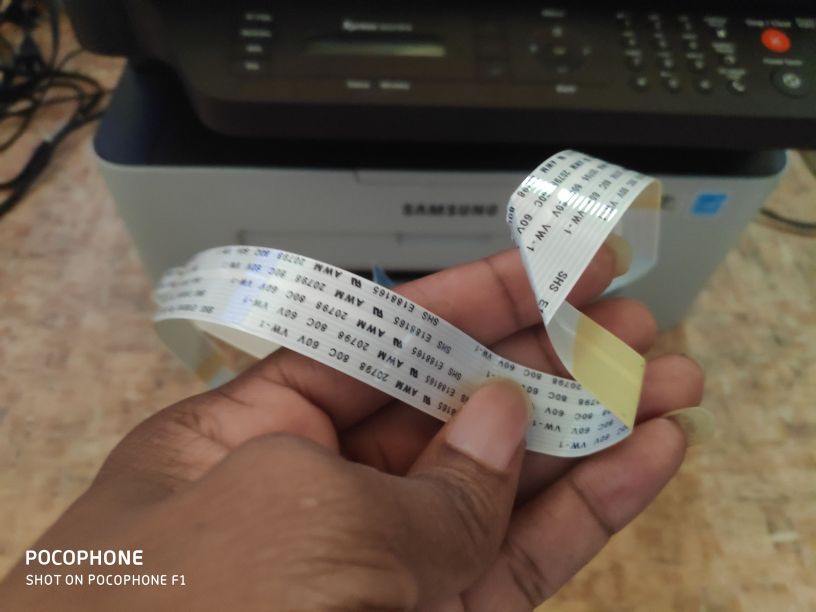
Removing the LSU Harness Cable


In replacing the cable I will be honest with you and say that i took the short cut way and forced it back between the frame of the printer and the High Voltage Power supply Board. It is a very tight fit and regretfully i dont have any images of behind the board and placement of the cable.
Results
Above I showcased the various areas to check in the case of this error, in my case I had to replace the cable. In the two instances I came across this problem though it was always the cable that was faulty. But because Samsung’s service manual suggests taking all these things into consideration, you can never be too sure. The cable in question is SHS E188165 AWM 20798 80C 60V VW-1 and can be found on ebay but I have never tested using one before.
